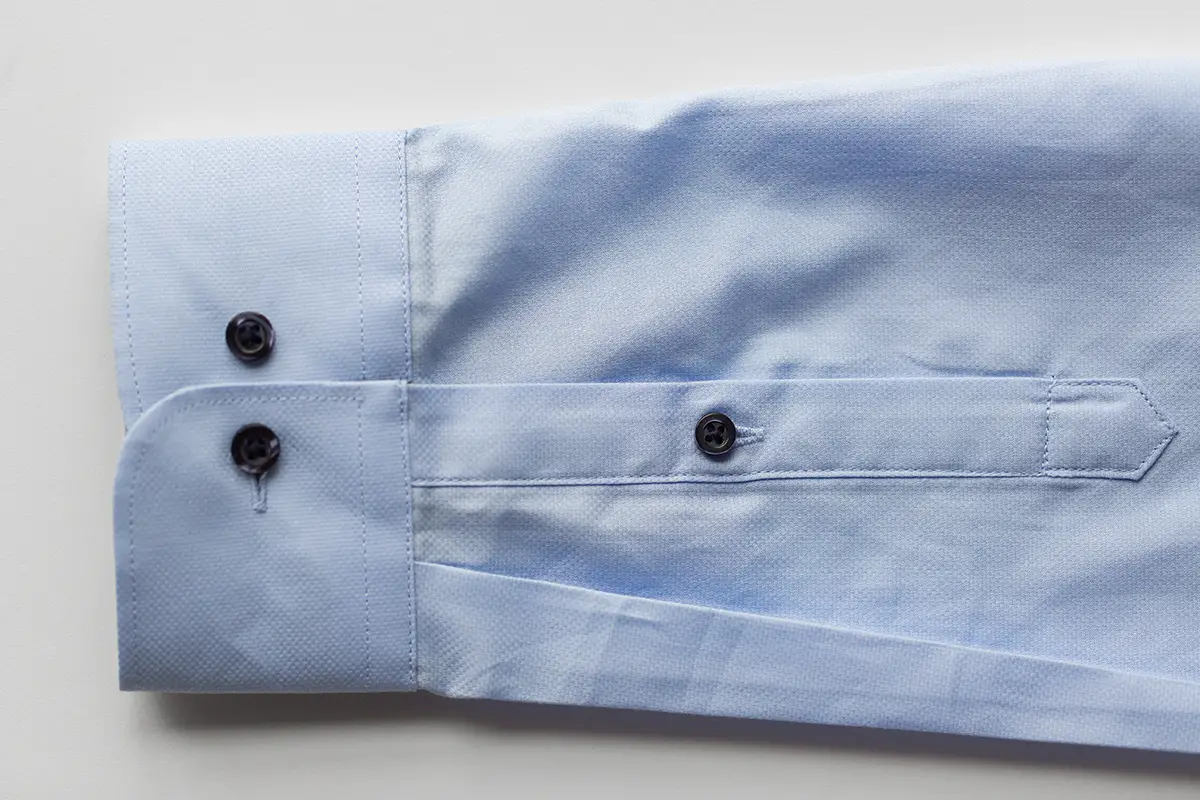
To make smart, stylish long-sleeved garments, it’s important to know how to sew cuffs. There are several ways to approach making cuffs depending on the style of the garment you’re making and the fabric you’re using. You may need a bit of practice to get the hang of them, but they’re all relatively simple and will give the clothes you make a professional look.
Making Cuffs for Shirts and Blouses
The type of cuff you’re most often likely to find yourself making is a simple formal cuff for a shirt or blouse. To make this you’ll need a strip of the same fabric, carefully matched for pattern and nap. On average this will be about ten inches wide by eight inches long, but you can vary it to suit the wrist measurements of the wearer, as individuals vary a great deal.
Start by giving your fabric a narrow hem, then fold it lengthways (with the back of your fabric on the inside) so that it overlaps itself by about half a centimetre at the top. Mark the position of the fold with chalk. You are now ready to start attaching the cuff to the sleeve. Place it against the edge of the sleeve so that the line of the fold is about half an inch below the end. You can then sew it into place close to the edge of the sleeve.
If you want to taper the cuff into the sleeve, this is when you will need to gather the fabric to draw it into place. Make sure you do so evenly. Leave half an inch of cuff sticking out at one edge of the sleeve. This will leave you room to add a fastening.
When the cuff is secure against the sleeve, fold it over at the fold line and press it flat with an iron. It’s important to make sure you’ve got any kinks out before you sew. You can then turn it wrong-side-up and fold the overlapping edge across the inner part of the cuff. Press it with the iron and use a single row of stitches to secure it in place. You should then run a parallel row of stitches along the lower fold, through the fabric of the sleeve as well.
Finally, run a row of stitches along each end of the cuff to close it. You can then add a button closure or make two buttonholes so it can be fastened using cufflinks.
Making Stretchy Cuffs
When you’re working with soft or stretchy fabrics like cotton jerseys, formal cuffs don’t look right and are difficult to sew, but inside-fitting stretchy cuffs are a great way to finish off the sleeves. They’ll give them definition and make them look neat without compromising on style or comfort.
To make a stretchy cuff, select a piece of fabric at least six inches long and stitch vertically along it to make a tube (making sure it’s big enough to fit over the hand of the wearer). Keeping the seam on the outside, fold one end of the tube over by about a centimetre and stitch it in place. Then pull the tube halfway inside-out so that the seams are hidden and you have a new tube half as long. Fit the open ends inside the sleeve and sew through all three layers of fabric to hold it in place.
Alternative Types of Cuff
Occasionally you may want to go for a very different look when sewing cuffs, whether it’s for costume purposes, for a special occasion, or just because you want to stand out from the crowd.
Lace cuffs are enduringly popular, especially for children’s clothes, and they’re easy to make. Simply take a strip of lace approximately twice as long as the end of the sleeve and pin it into place on the inside edge of the fabric, gathering it at even intervals so that it’s distributed evenly. Sew it into place with zigzag stitches and secure it by sewing a ribbon of fabric – ideally the same material as the sleeve, so it will move in the same way – along the inside of the sleeve.
Elasticated cuffs can be made in the same manner as the stretchy cuffs described above, but with an inner layer of elastic, that should measure half the length and the same width as the cuff fabric when it (the elastic) is stretched. Make this into a separate ring inside the tube of the cuff and simply sew it into place as usual.
It’s also possible to alter the shape of the basic shirt cuff to make pointed or wavy-edged cuffs for striking looking sleeves. Once you’ve got the hang of the basics, you’ll find there are lots of possibilities.

